
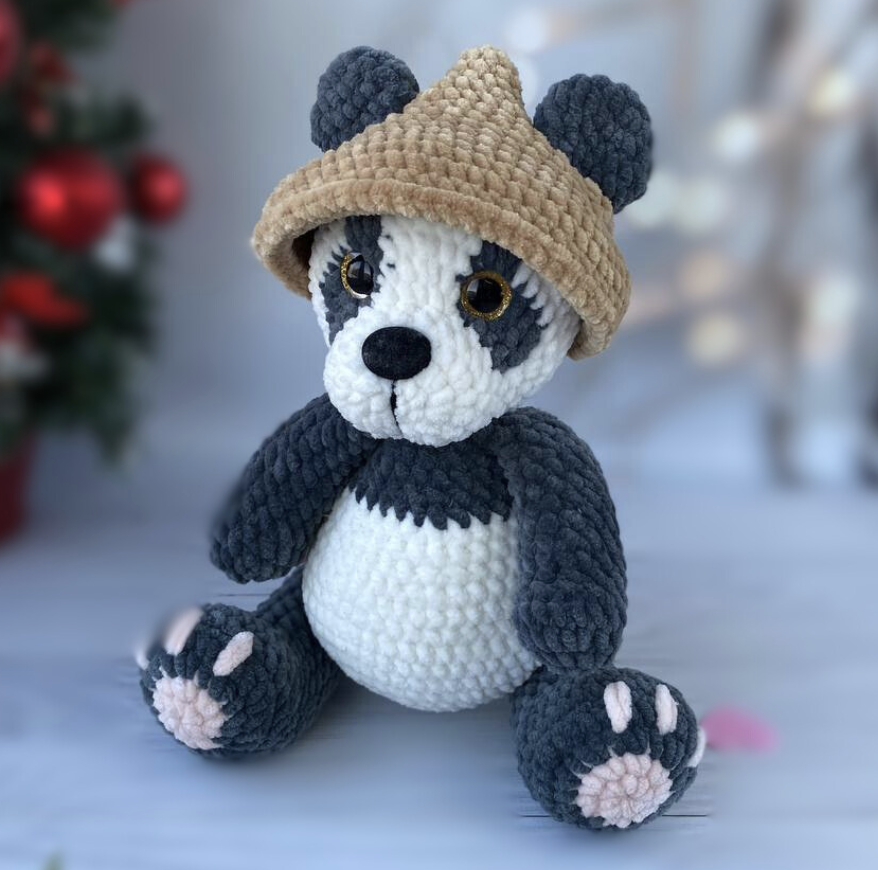
Creating a soft crochet panda is much easier when the project is divided into clear construction checkpoints. This pattern by Rosalie_Toys uses plush Himalaya Dolphin Baby yarn, a 4 mm crochet hook, contrasting black and white sections, pink feet, and a brown hat. Instead of sewing every individual component onto the finished toy, several parts are incorporated directly while crocheting continues. That construction method gives the finished panda a unified shape while also making placement and symmetry especially important.
This guide presents the project as a workshop-style sequence. Each major section includes the exact stitch instructions from the pattern, followed by practical checkpoints that help you keep the construction organized. The technical instructions themselves remain unchanged, including the stitch counts, rounds, color changes, attachment points, and placement instructions.
What Makes This Panda Pattern Different?
The panda is built from several recognizable components, but the way those components come together is the most important feature of the construction. The ears are crocheted separately and later attached during the head round. The legs are incorporated into the body in the written no-joint version, while the arms are incorporated later. The head is then sewn onto the completed body, and the tail is sewn into its specified position.
The pattern also provides an optional jointed-leg approach. The written PDF uses the no-joint version, while the designer’s video demonstrates the jointed method using 30 mm joints. These two construction methods should be treated separately rather than combined.
Materials for the Project
Gather the materials before starting so that the color changes and attachment stages can be completed without interruption.
- Crochet hook: 4 mm
- Main yarn: Himalaya Dolphin Baby white
- Secondary yarn: Himalaya Dolphin Baby black and pink
- Hat yarn: brown
- Safety eyes: 16 mm
- Safety nose: 15/22 mm
- Joints: 30 mm, optional
- Yarn needle
- Scissors
- Hollowfiber
- Stitch marker
The source does not specify a finished size, gauge, or total yarn yardage. Those details should therefore not be estimated or added to the project instructions.
Crochet Abbreviations
The following abbreviations are used throughout the pattern:
- MR: magic ring
- ch: chain
- sl st: slip stitch
- sc: single crochet
- dec: decrease
- inc: increase, meaning 2 sc in one stitch
- BLO: back loop only
- cc: color change
- FO: fasten off
- (…): repeat the instructions in parentheses
- *…: repeat the indicated instructions the number of times shown
A Note About Sewing and Attached Pieces
Before starting, pay attention to one of the pattern’s most useful construction notes: do not leave yarn tails for sewing pieces unless the pattern specifically says to do so. Only the head and tail are sewn onto the finished construction. The other components are attached as crocheting progresses.
This means that the project should not be approached as a typical amigurumi where every piece is completed first and then sewn together at the end. Keeping the attachment rounds visible in your working notes will help prevent accidental changes to the construction.
Workshop Stage 1: Make the Black Ears
Make two identical ears in black yarn. These small pieces are folded rather than stuffed.
- R1: 8 sc in MR
- R2: 8 inc (16)
- R3: 3 sc, inc, 7 sc, inc, 4 sc (18)
- R4: 18 sc around
- R5: 4 sc, dec, 6 sc, dec, 4 sc (16)
- R6: 2 sc, 2 dec, 4 sc, 2 dec, 2 sc (12)
After R6, work 2 sc. Fold the ear in half and crochet 6 sc through both sides. Cut the yarn and fasten off. Do not stuff the ear.
Repeat the complete process for the second ear. Because the ears will later be attached during head R16, do not add unnecessary sewing tails.
Workshop Stage 2: Build the Tail
The tail is another small black component, but unlike the ears, it receives a small amount of stuffing and is specifically sewn onto the body later.
- R1: 6 sc in MR
- R2: 6 inc (12)
- R3: 12 sc
- R4: (sc, dec)*4 (8)
Stuff the tail lightly. Cut the yarn and fasten off, leaving a tail for sewing. The pattern specifies that the tail is placed between R7 and R9.
A light amount of stuffing is important here because the pattern does not call for a heavily packed tail. The purpose of the stuffing is to support the shape while keeping the small piece soft.
Workshop Stage 3: Crochet Both Arms
The arms are worked in black yarn. Make two arms and stuff them as you crochet from R1 through R12.
- R1: 6 sc in MR
- R2: 6 inc (12)
- R3: 4 sc, 3 inc, 5 sc (15)
- R4: 15 sc
- R5: 5 sc, 3 dec, 4 sc (12)
- R6: 12 sc
- R7: 5 sc, inc, 6 sc (13)
- R8-R13: 13 sc around (6 rows)
- R14: 5 sc, dec, 6 sc (12)
- R15: 12 sc
Work 2 sc, fold the arm in half, and crochet 6 sc through both sides. Cut the yarn and fasten off.
While stuffing the arm, keep the fiber distributed rather than creating a hard lump at one end. The pattern’s instruction to stuff through R1-R12 provides a useful construction boundary for this step.
Workshop Stage 4: Create the Two Feet
The legs begin in pink yarn and change to black after R2. This creates the contrasting feet before the remainder of the legs continues in black.
- R1: 8 sc in MR
- R2: 8 inc (16), cc to black
- R3: (sc, inc)*8 (24)
- R4: (3 sc, inc)*6 (30)
- R5: 30 sc (BLO)
- R6: 30 sc around
- R7: 9 sc, 6 dec, 9 sc (24)
- R8: 6 sc, 6 dec, 6 sc (18)
- R9: 7 sc, 2 dec, 7 sc (16)
- R10-R12: 16 sc around (3 rows)
- R13: dec, 14 sc (15)
- R14-R16: 15 sc around (3 rows)
- R17: (sc, dec)*5 (10)
Stuff the legs as you work from R1 through R15.
After R17, work 2 sc and fold the leg in half. Before closing it, make sure the foot faces forward rather than toward the side. If necessary, adjust the stitches. Crochet 5 sc through both sides, then cut the yarn and fasten off.
The Most Important Leg Checkpoint
Do not rush the final closure of the legs. The pattern specifically calls attention to the direction of the feet. A perfectly crocheted leg can still look incorrect if its foot is turned sideways when it is incorporated into the body.
Make the second leg using the same construction and compare the two pieces before continuing.
Workshop Stage 5: Form the Body Around the Legs
The body begins with white yarn and gradually expands through the first eight rounds.
- R1: 6 sc in MR
- R2: 6 inc (12)
- R3: (sc, inc)*6 (18)
- R4: (2 sc, inc)*6 (24)
- R5: (3 sc, inc)*6 (30)
- R6: (4 sc, inc)*6 (36)
- R7: (5 sc, inc)*6 (42)
- R8: (6 sc, inc)*2, 2 sc, inc, 6 sc, inc, 3 sc, inc, 6 sc, inc, 7 sc (48)
For the no-joint version shown in the written PDF, attach the legs during R9:
R9: 9 sc, 5 sc tog with leg, 18 sc, 5 sc tog with leg, 11 sc (48).
Make sure both legs face forward and remain symmetrical. The source allows you to adjust the stitch if necessary.
For the jointed version, R9 is 48 sc around and the jointed legs are attached after R12. The jointed construction is demonstrated in the designer’s video.
Continue Shaping the Body
- R10-R12: 48 sc around (3 rows)
- R13: (6 sc, dec)*6 (42)
- R14: (5 sc, dec)*6 (36)
- R15: 36 sc around
- R16: (4 sc, dec)*6 (30)
- R17: 30 sc around, cc to black
- R18: (3 sc, dec)*6 (24)
- R19-R20: 24 sc around (2 rows)
- R21: (2 sc, dec)*6 (18)
The arms are incorporated during R22:
R22: 2 sc, 6 sc tog with arm, 3 sc, 6 sc tog with arm, sc (18), cc to white.
Adjust the stitch placement if necessary.
Finish the body with:
R23: dec, 7 sc, dec, 7 sc (16).
Cut the yarn and fasten off, leaving a tail for sewing.
Body Inspection Before Moving to the Head
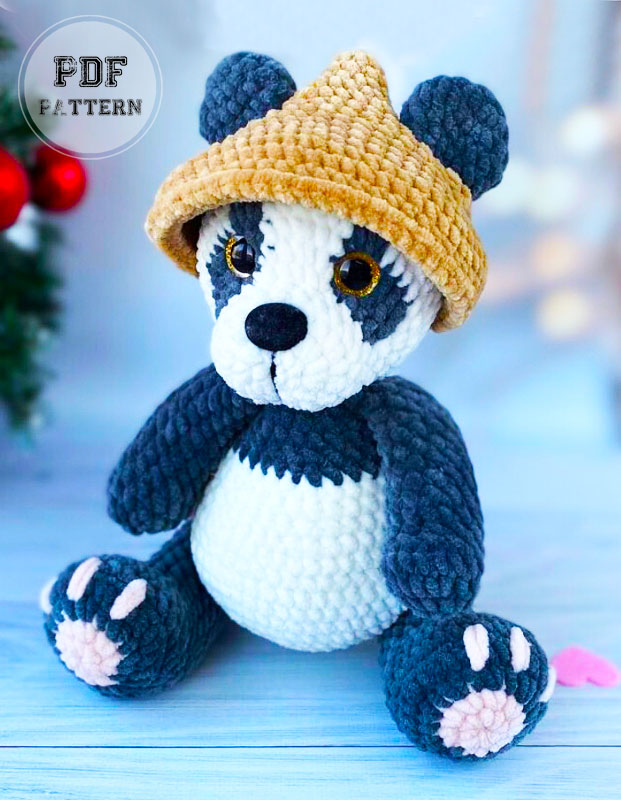
At this point, inspect the panda from the front. The legs should point forward, the arms should be positioned according to R22, and the color transition should be clear. This is also the best time to make sure the body has not developed obvious asymmetry from an accidentally shifted attachment point.
Remember that the source specifically allows stitch adjustments when necessary during attachment. Do not create new rounds or alter the stitch counts simply to reshape the body.
Workshop Stage 6: Crochet the Panda Head
The head is the most detailed section of the project because it combines shaping with black-and-white color changes and precise facial placement.
- R1: 6 sc in MR
- R2: 6 inc (12)
- R3: 2 sc, (3 sc in one st)*2, 4 sc, (3 sc in one st)*2, 2 sc (20)
- R4: 5 sc, inc, 8 sc, inc, 5 sc (22)
- R5-R6: 22 sc around (2 rows)
Rounds R7-R10 contain the color-changing work. The pattern identifies the white and black yarn sections through the color coding in the original instructions, and the designer’s video provides additional visual guidance for these rounds.
- R7: 6 sc, 3 inc, 3 inc, 3 inc, 7 sc (31)
- R8: 6 sc, inc, 3 sc, inc, 2 sc, sc, inc, 2 sc, 2 sc, inc, 3 sc, inc, 7 sc (36)
- R9: 7 sc, inc, sc, 3 sc, inc, 2 sc, 2 sc, inc, 2 sc, 2 sc, inc, 3 sc, sc, inc, 8 sc (41)
- R10: 9 sc, inc, 5 sc, inc, sc, 3 sc, inc, 2 sc, sc, inc, 6 sc, inc, 9 sc (46)
- R11: 13 sc, inc, 19 sc, inc, 12 sc (48)
Face Placement: Eyes and Nose
Before moving farther down the head, install the safety features at the positions specified in the pattern.
The 16 mm safety eyes are placed between rows 8 and 9, approximately 7 visible stitches apart.
The 15/22 mm safety nose is placed between rows 3 and 4.
These placement instructions should be treated as fixed pattern information. Avoid replacing them with estimated measurements because even a small change can alter the expression of the finished panda.
Workshop Stage 7: Finish the Head and Attach the Ears
Continue the head with the following rounds:
- R12-R14: 48 sc around (3 rows)
- R15: (6 sc, dec)*6 (42)
R16 is the ear attachment round:
R16: 12 sc, 6 sc tog with ear, 7 sc, 6 sc tog with ear, 11 sc (42).
Adjust the stitch if necessary and refer to the photo when positioning the ears.
- R17: (5 sc, dec)*6 (36)
- R18: (4 sc, dec)*6 (30)
Start stuffing at R18.
- R19: (3 sc, dec)*6 (24)
- R20: (2 sc, dec)*6 (18)
- R21: (sc, dec)*6 (12)
- R22: 6 dec
Cut the yarn, close the opening, and sew the head to the body.
How to Approach Head Stuffing
Stuffing begins at R18 rather than at the beginning of the head. This is an important part of the original construction and should not be moved to an earlier round simply because the head looks empty while you are crocheting.
Once stuffing begins, add hollowfiber gradually. The purpose is to support the crocheted shape created by the increases and decreases. Pay particular attention to even distribution around the facial area so that the head does not develop a noticeably harder section on one side.
Do not add or remove rounds to change the head size. The shaping is already established by the written sequence.
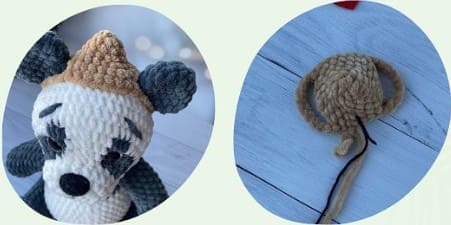
Workshop Stage 8: Crochet the Brown Hat
The hat is worked separately in brown yarn. It begins with a small circle and gradually increases to 60 stitches.
- R1: 5 sc in MR
- R2: 5 inc (10)
- R3: 10 sc around
- R4: (sc, inc)*5 (15)
- R5: (2 sc, inc)*5 (20)
- R6: (3 sc, inc)*5 (25)
R7 introduces the two chain sections:
R7: 3 sc, ch 9, 6 st skip, 8 sc, ch 9, 6 st skip, 3 sc (32).
At this point, try the hat on the head and adjust the stitch if necessary, as instructed by the pattern.
Continue:
- R8: 3 sc, 9 sc on chain, 8 sc, 9 sc on chain, 3 sc (32)
- R9: (6 sc, inc)*3, 5 sc, inc, 5 sc (36)
- R10: (5 sc, inc)*6 (42)
- R11: (6 sc, inc)*6 (48)
- R12: (7 sc, inc)*6 (54)
- R13: (8 sc, inc)*6 (60)
- R14-R15: 60 sc around (2 rows)
- R16: 60 sl st
Cut the yarn and fasten off.
Why the Hat Fitting Check Matters
The instruction to try the hat on the head at R7 is one of the most useful visual checkpoints in the entire project. The hat contains chain spaces and skipped stitches, so its shape is not created solely by standard circular increases.
Checking the fit before completing the hat allows you to identify whether a stitch adjustment is necessary at the exact point specified by the designer. Once the remaining rounds are finished, the hat will have more structure and fewer opportunities for adjustment.
Final Assembly Workflow
Once the main crocheted sections are complete, the assembly can be reviewed as a short sequence.
- Confirm that both ears are finished and unstuffed.
- Confirm that the tail is lightly stuffed and has its sewing tail.
- Confirm that both arms were stuffed through R1-R12.
- Confirm that both feet point forward.
- Check the leg attachment and symmetry on the body.
- Check the arm attachment at R22.
- Complete the head and close it after R22.
- Stuff the head beginning at R18.
- Sew the completed head to the body.
- Place the tail between R7 and R9.
- Complete the brown hat.
- Try the hat on the head as instructed during R7.
- Finish the face shaping and embroidery using the designer’s tutorial.
Symmetry Check Before the Final Details
Symmetry is particularly valuable in a panda because the black-and-white color arrangement makes small placement differences easy to notice. Compare the two ears, feet, and arms from the front. The feet should face forward, and the arms should be attached according to the body construction.
The eye placement also deserves a final visual check. Both eyes should remain between rows 8 and 9 and approximately 7 visible stitches apart. If you are still at the stage where safety eyes can be repositioned, check them before continuing.
Common Problems and Practical Solutions
The Ear Looks Too Large
First check the stitch counts rather than changing the shape. The ear ends with 12 stitches before the folding and closure process. It is also intentionally left unstuffed.
The Tail Looks Too Firm
The pattern specifically calls for light stuffing. Remove excess fiber if the tail becomes unnecessarily rigid or bulky.
The Leg Shape Looks Uneven
Check the increases and decreases in R3 through R17 and make sure both feet are facing forward before closing the legs. The source specifically permits stitch adjustment when needed for foot orientation.
The Body Looks Twisted
Inspect the leg attachment during R9. The no-joint version uses 5 sc tog with each leg. Both legs should be forward-facing and symmetrical.
The Arms Are Not Even
Review the placement during R22. The attachment sequence is 2 sc, 6 sc tog with arm, 3 sc, 6 sc tog with arm, sc. If necessary, the source allows the stitch position to be adjusted.
The Face Does Not Match the Intended Expression
Check the safety-eye placement and nose position. The eyes belong between rows 8 and 9, about 7 visible stitches apart, while the nose belongs between rows 3 and 4.
The Hat Needs a Fit Adjustment
Check the hat at R7, exactly where the pattern instructs you to try it on the head. This is the appropriate checkpoint for any stitch adjustment.
Written Pattern Versus Jointed Leg Option
The source presents two approaches for the legs. The written PDF uses the no-joint construction. The video demonstrates a jointed version using 30 mm joints.
For the no-joint body, R9 contains the leg attachments:
9 sc, 5 sc tog with leg, 18 sc, 5 sc tog with leg, 11 sc (48).
For the jointed approach, R9 is:
48 sc around.
The jointed legs are then attached after R12 according to the video tutorial.
These methods should not be merged. Choose the written no-joint approach when following the PDF, or use the designer’s video as the reference for the jointed construction.
Photo and Visual Reference Points
The visual portions of this project are most useful at the moments where placement affects the finished appearance. The completed panda provides an overall reference for the final proportions. The face image is useful when checking the placement of the safety features, while the hat image helps visualize the final decorative section.
For the head’s color-changing rounds and the facial shaping process, the designer’s video is also an important reference because those techniques are easier to understand visually than from text alone.
Quick Stitch Checkpoints
- Ear: R6 ends at 12 stitches before folding.
- Tail: R4 ends at 8 stitches.
- Arm: R7 reaches 13 stitches and R14 returns to 12 stitches.
- Leg: R4 reaches 30 stitches and R17 ends at 10 stitches.
- Body: R8 reaches 48 stitches.
- Body: R9 remains at 48 stitches in the no-joint version.
- Body: R22 remains at 18 stitches after arm attachment.
- Head: R11 reaches 48 stitches.
- Head: R16 remains at 42 stitches after ear attachment.
- Head: R18 reaches 30 stitches and begins stuffing.
- Hat: R13 reaches 60 stitches.
- Hat: R16 consists of 60 sl st.
Pattern Organization at a Glance
The complete project can be remembered as three major construction zones: the individual components, the integrated body and head, and the finishing pieces.
Individual components: ears, tail, arms, and legs.
Integrated construction: body with legs and arms, followed by the head with ears.
Finishing: sewing the head and tail, completing the face shaping and embroidery, and making the brown hat.
This organization is useful when planning your crochet session because it separates the pieces that can be prepared independently from the rounds where careful placement is required.
Creator and Pattern Use
The pattern is created by @Rosalie_Toys. The source requests credit to the creator and states that the pattern should not be copied or redistributed as someone else’s work. Finished handmade items made from the pattern may be sold according to the creator’s stated terms.
The creator also provides a video tutorial for the panda. The video is particularly useful for the head color changes, face shaping, and the optional jointed-leg construction.
Frequently Asked Questions
What hook size should I use?
The specified crochet hook is 4 mm.
Which yarn colors are used?
The main color is white Himalaya Dolphin Baby. Black and pink Himalaya Dolphin Baby are used for the contrasting parts, while brown is used for the hat.
Are the ears stuffed?
No. The pattern specifically instructs you not to stuff the ears.
Should the tail be stuffed?
Yes, but only lightly.
When should the arms be stuffed?
The pattern instructs you to stuff the arms as you go from R1 through R12.
When should the legs be stuffed?
The legs are stuffed from R1 through R15.
Where should the tail be sewn?
The tail is placed between R7 and R9.
Where do the eyes go?
The 16 mm safety eyes are placed between rows 8 and 9, approximately 7 visible stitches apart.
Where does the nose go?
The 15/22 mm safety nose is placed between rows 3 and 4.
When are the ears attached to the head?
The ears are incorporated during R16 of the head.
When does head stuffing begin?
Stuffing begins at R18.
Does the pattern require 30 mm joints?
No. The joints are optional. The written PDF uses the no-joint version, while the video demonstrates a jointed option.
Does the pattern give a finished size?
No finished size is provided in the source.
Does the pattern include a gauge?
No gauge is provided in the source.
Final Workshop Checklist
- Use a 4 mm hook.
- Prepare white, black, pink, and brown yarn as specified.
- Prepare 16 mm safety eyes and a 15/22 mm safety nose.
- Make two unstuffed black ears.
- Make the lightly stuffed black tail and keep its sewing tail.
- Make two black arms and stuff through R1-R12.
- Make two legs beginning in pink and changing to black after R2.
- Keep both feet facing forward.
- Attach the legs to the body according to the written no-joint R9 instructions.
- Attach the arms during body R22.
- Complete the head color changes through R7-R10.
- Place the eyes between R8 and R9.
- Place the nose between R3 and R4.
- Attach the ears during head R16.
- Begin stuffing the head at R18.
- Close the head after R22 and sew it to the body.
- Place the tail between R7 and R9.
- Make the brown hat.
- Try the hat on at R7.
- Finish the hat at R16 with 60 sl st.
- Complete the face shaping and embroidery using the designer’s tutorial.
Final Thoughts on Making the Panda
This panda pattern is a good example of how careful construction can create a polished amigurumi without requiring every component to be sewn on separately. The legs and arms become part of the body as it is crocheted, while the ears become part of the head. This makes placement checkpoints more important than simply completing each component correctly.
The most valuable habit throughout the project is to pause at every attachment stage and look at the panda from the front. Check the feet before closing the legs, check the legs during body R9, check the arms during body R22, and check the ears during head R16. These moments are where orientation and symmetry have the greatest effect on the final result.
The face deserves the same attention. The safety eyes, nose, and black-and-white color changes establish the panda’s expression. Following the specified rows and visible-stitch spacing keeps the facial placement faithful to the original design.
Finally, the brown hat completes the character. Its chain sections and skipped stitches make R7 an important fitting checkpoint, while the later increases expand the hat to 60 stitches before the final slip-stitch round.
By working through the project in these clearly defined stages and respecting every original round, stitch count, color change, and attachment instruction, you can maintain the structure of Rosalie_Toys’ original panda pattern while making the process easier to follow from the first magic ring to the finished hat.