
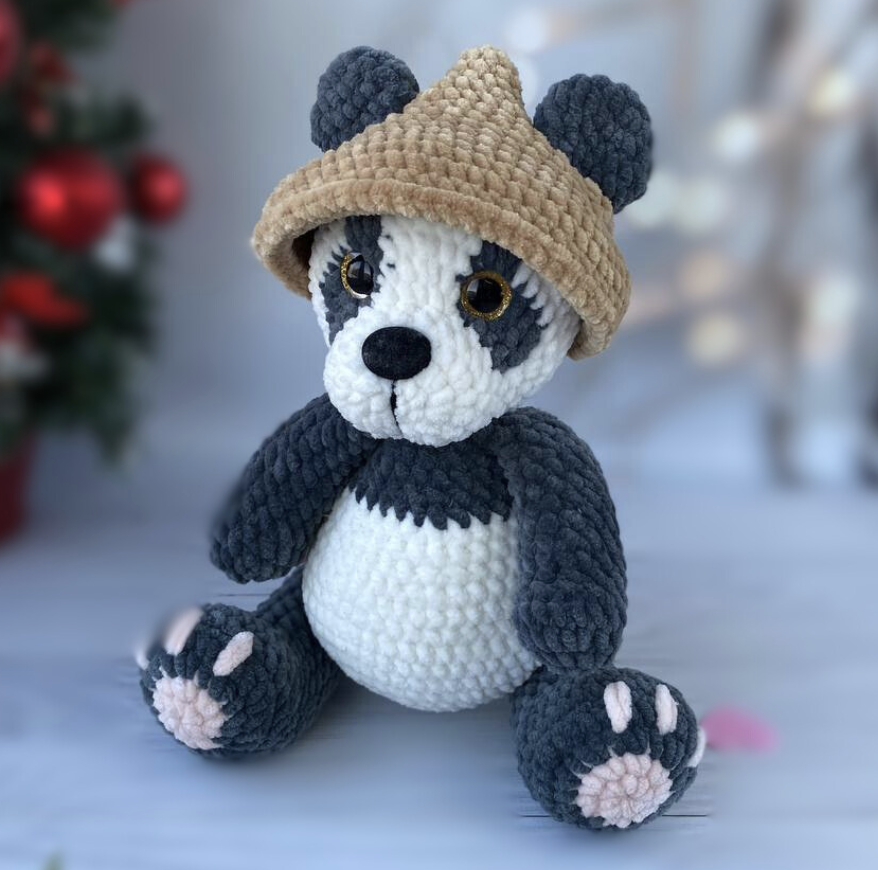
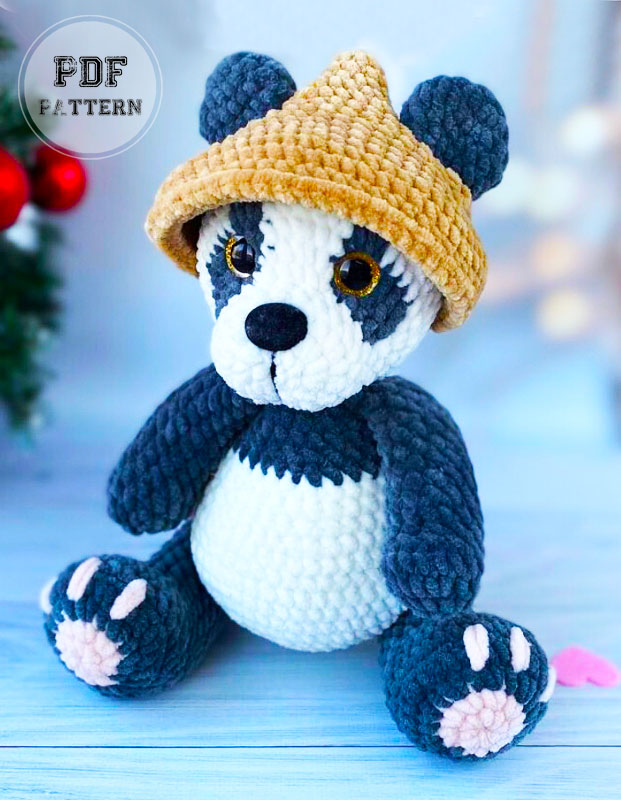
If you enjoy making soft and expressive amigurumi toys, this crochet panda pattern is a wonderful project to add to your handmade collection. The design combines a rounded plush body, a detailed black-and-white face, large ears, soft arms and legs, and a charming brown hat that gives the finished panda its recognizable personality.
This tutorial is based on the free panda pattern created by Rosalie_Toys. The original pattern uses a 4 mm crochet hook, Himalaya Dolphin Baby yarn, safety eyes, a safety nose, Hollowfiber stuffing, and several colors to create the panda’s characteristic appearance. The written pattern also includes an optional jointed-leg version, while the PDF itself presents the version without joints.
One of the most interesting features of this project is the way several pieces are incorporated while crocheting rather than being sewn on afterward. The legs can be joined directly to the body, the arms are incorporated into the body, and the ears are attached during the head construction. According to the original instructions, only the head and tail are sewn on.
Why This Crochet Panda Is a Fun Project
This panda is more than a simple collection of basic crochet shapes. The project gives you an opportunity to practice several important amigurumi techniques while creating one complete character.
You will work with magic rings, increases, decreases, back-loop-only stitches, color changes, crocheted joins, stuffing, shaping, and final sewing. The head is especially important because the black-and-white facial pattern is formed during several color-changing rounds.
The finished panda has a soft rounded silhouette. Its white belly contrasts with the black upper body, while the pink sections on the feet add a small accent. The brown hat is worked separately and includes openings that allow the panda’s ears to pass through.
Materials You Need
- 4 mm crochet hook
- Himalaya Dolphin Baby in white for the main body color
- Himalaya Dolphin Baby in black and pink for the secondary colors
- Brown yarn for the hat
- 16 mm safety eyes
- 15/22 mm safety nose
- 30 mm joints, optional
- Yarn needle
- Scissors
- Hollowfiber
- Stitch marker
The source does not provide a total yarn yardage, finished size, or gauge. These details should therefore not be estimated or added as if they were part of the original pattern.
Crochet Abbreviations
- MR: magic ring
- ch: chain
- sl st: slip stitch
- sc: single crochet
- dec: decrease
- inc: increase, 2 sc in one stitch
- BLO: back loop only
- cc: color change
- FO: fasten off
- (…): repeat the instructions in parentheses
- *…: repeat the instructions the number of times shown
Before beginning, keep in mind one important instruction from the original pattern: do not leave yarn tails for sewing on pieces unless the pattern specifically says to do so. Only the head and tail are sewn on. The other parts are attached as you crochet.
Getting Started with the Panda
A good way to approach this project is to divide it into several construction stages. First make the ears, tail, and arms. Then crochet the legs and body. The head comes next because it contains the most detailed color changes and facial placement. Finally, make the brown hat separately.
Since this is a plush amigurumi design, stuffing is introduced at different stages. The arms are stuffed as you go through R1-R12. The legs are stuffed as you go through R1-R15. The tail is stuffed lightly, while the head begins stuffing at R18.
Step 1: Crochet the Ears
Make two ears in black yarn.
Start with black.
- R1: 8 sc in a MR
- R2: 8 inc (16)
- R3: 3 sc, inc, 7 sc, inc, 4 sc (18)
- R4: 18 sc around
- R5: 4 sc, dec, 6 sc, dec, 4 sc (16)
- R6: 2 sc, 2 dec, 4 sc, 2 dec, 2 sc (12)
Work 2 sc, fold the ear in half, and crochet 6 sc through both sides. Cut the yarn and fasten off. Do not stuff the ears.
The ears remain compact because they are folded rather than stuffed. They will later be attached directly during R16 of the head.
Step 2: Make the Tail
The tail is also worked in black.
- R1: 6 sc in a MR
- R2: 6 inc (12)
- R3: 12 sc
- R4: (sc, dec)*4 (8)
Stuff the tail lightly. Cut the yarn and fasten off, leaving a tail for sewing. The pattern specifies placing the tail between R7 and R9.
Unlike the ears and arms, the tail is one of the pieces that is specifically sewn onto the finished panda, so keep the sewing tail here.
Step 3: Crochet the Arms
Make two arms using black yarn. The original instructions tell you to stuff the arms as you go from R1-R12.
- R1: 6 sc in a MR
- R2: 6 inc (12)
- R3: 4 sc, 3 inc, 5 sc (15)
- R4: 15 sc around
- R5: 5 sc, 3 dec, 4 sc (12)
- R6: 12 sc around
- R7: 5 sc, inc, 6 sc (13)
- R8-R13: 13 sc around (6 rows)
- R14: 5 sc, dec, 6 sc (12)
- R15: 12 sc around
Work 2 sc, fold the arm in half, and crochet 6 sc through both sides. Cut the yarn and fasten off.
When making the second arm, try to maintain the same amount of stuffing and overall shape as the first. This helps the finished panda look balanced.
Step 4: Crochet the Legs
The legs begin with pink yarn and then change to black after R2. Stuff the legs as you go through R1-R15.
- R1: 8 sc in a MR
- R2: 8 inc (16), cc to black
- R3: (sc, inc)*8 (24)
- R4: (3 sc, inc)*6 (30)
- R5: 30 sc (BLO)
- R6: 30 sc around
- R7: 9 sc, 6 dec, 9 sc (24)
- R8: 6 sc, 6 dec, 6 sc (18)
- R9: 7 sc, 2 dec, 7 sc (16)
- R10-R12: 16 sc around (3 rows)
- R13: dec, 14 sc (15)
- R14-R16: 15 sc around (3 rows)
- R17: (sc, dec)*5 (10)
After R17, work 2 sc and fold the leg in half. Make sure the feet face forward rather than to the side. Adjust stitches if necessary, then crochet 5 sc through both sides. Cut the yarn and fasten off.
The source pattern gives two leg options. The PDF uses the version without joints. The optional 30 mm joints are demonstrated separately in the creator’s video tutorial.
Step 5: Build the Body
The body begins with the main color.
- R1: 6 sc in a MR
- R2: 6 inc (12)
- R3: (sc, inc)*6 (18)
- R4: (2 sc, inc)*6 (24)
- R5: (3 sc, inc)*6 (30)
- R6: (4 sc, inc)*6 (36)
- R7: (5 sc, inc)*6 (42)
- R8: (6 sc, inc)*2, 2 sc, inc, 6 sc, inc, 3 sc, inc, 6 sc, inc, 7 sc (48)
For the version without joints, attach the legs directly during R9:
R9: 9 sc, 5 sc tog with leg, 18 sc, 5 sc tog with leg, 11 sc (48).
The legs must face forward and remain symmetrical. Adjust the stitch if necessary.
For the jointed version, R9 is 48 sc around. The legs with joints are attached to the body after R12.
- R10-R12: 48 sc around (3 rows)
- R13: (6 sc, dec)*6 (42)
- R14: (5 sc, dec)*6 (36)
- R15: 36 sc around
- R16: (4 sc, dec)*6 (30)
- R17: 30 sc around, cc to black
- R18: (3 sc, dec)*6 (24)
- R19-R20: 24 sc around (2 rows)
- R21: (2 sc, dec)*6 (18)
- R22: 2 sc, 6 sc tog with arm, 3 sc, 6 sc tog with arm, sc (18), cc to white
- R23: dec, 7 sc, dec, 7 sc (16)
Adjust if necessary where the arms are joined. Cut the yarn and fasten off, leaving a tail for sewing.
Step 6: Crochet the Head and Create the Face
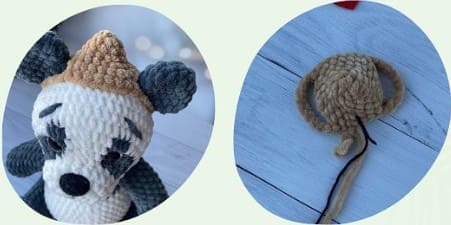
The head is the section that gives this panda its distinctive expression. The first rounds establish the rounded shape, while R7-R10 introduce the color changes that form the contrasting facial areas.
- R1: 6 sc in a MR
- R2: 6 inc (12)
- R3: 2 sc, (3 sc in one st)*2, 4 sc, (3 sc in one st)*2, 2 sc (20)
- R4: 5 sc, inc, 8 sc, inc, 5 sc (22)
- R5-R6: 22 sc around (2 rows)
In rounds 7-10, the original pattern uses two yarn colors. The black text represents white yarn, while the red text represents black yarn in the original visual pattern.
- R7: 6 sc, 3 inc, 3 inc, 3 inc, 7 sc (31)
- R8: 6 sc, inc, 3 sc, inc, 2 sc, sc, inc, 2 sc, 2 sc, inc, 3 sc, inc, 7 sc (36)
- R9: 7 sc, inc, sc, 3 sc, inc, 2 sc, 2 sc, inc, 2 sc, 2 sc, inc, 3 sc, sc, inc, 8 sc (41)
- R10: 9 sc, inc, 5 sc, inc, sc, 3 sc, inc, 2 sc, sc, inc, 6 sc, inc, 9 sc (46)
- R11: 13 sc, inc, 19 sc, inc, 12 sc (48)
Place the eyes between rows 8 and 9, with about 7 visible stitches between them. Place the nose between rows 3 and 4.
These placements are important because the face is one of the strongest visual features of the finished panda. Before permanently securing the safety eyes and nose, check that the face is centered and that the two eyes are positioned symmetrically.
- R12-R14: 48 sc around (3 rows)
- R15: (6 sc, dec)*6 (42)
- R16: 12 sc, 6 sc tog with ear, 7 sc, 6 sc tog with ear, 11 sc (42)
- R17: (5 sc, dec)*6 (36)
- R18: (4 sc, dec)*6 (30)
- R19: (3 sc, dec)*6 (24)
- R20: (2 sc, dec)*6 (18)
- R21: (sc, dec)*6 (12)
- R22: 6 dec
Start stuffing at R18. The ears are added during R16. Adjust the stitch if necessary and use the visual reference while attaching them.
After R22, cut the yarn and close the hole. The completed head is sewn to the body.
Face Shaping Tips
The original pattern includes a video tutorial for the more difficult facial stages. This is especially useful for the color changes in R7-R10 and for shaping the face after the crocheting is complete.
When working the face, concentrate on keeping the eye placement even and maintaining the specified relationship between the eyes and nose. The pattern calls for the eyes between rows 8 and 9 and the nose between rows 3 and 4.
Do not alter the written stitch counts simply to make the face appear different. If an adjustment is needed during an attachment stage, use the pattern’s own instruction to adjust the stitch where specified.
Step 7: Sew the Head to the Body
Once the head is finished and the opening has been closed, sew the head to the body using the remaining yarn tail.
Before completing the seam, check the panda from the front. The feet should face forward, the arms should sit evenly on both sides, and the face should be centered over the body.
Step 8: Crochet the Brown Hat
The hat is worked separately in brown yarn. Its construction starts from a small magic ring and expands through several rounds of increases. R7 creates the two openings that accommodate the panda’s ears.
- R1: 5 sc in a MR
- R2: 5 inc (10)
- R3: 10 sc around
- R4: (sc, inc)*5 (15)
- R5: (2 sc, inc)*5 (20)
- R6: (3 sc, inc)*5 (25)
- R7: 3 sc, ch 9, 6 st skip, 8 sc, ch 9, 6 st skip, 3 sc (32)
- R8: 3 sc, 9 sc on the chain, 8 sc, 9 sc on the chain, 3 sc (32)
- R9: (6 sc, inc)*3, 5 sc, inc, 5 sc (36)
- R10: (5 sc, inc)*6 (42)
- R11: (6 sc, inc)*6 (48)
- R12: (7 sc, inc)*6 (54)
- R13: (8 sc, inc)*6 (60)
- R14-R15: 60 sc around (2 rows)
- R16: 60 sl st
Cut the yarn and fasten off.
The original instructions specifically recommend trying the hat on the head after R7 and adjusting the stitch if necessary. This is a useful fitting checkpoint because the position of the ear openings determines how naturally the hat sits around the panda’s head.
Keeping the Panda Symmetrical
Symmetry is particularly important in this project because the panda has a large rounded face and two prominent feet. A small positioning error can become noticeable once the plush toy is completely assembled.
When attaching the legs to the body, make sure both feet face forward. When attaching the arms, check that they sit at comparable heights. During R16 of the head, compare both ear positions before continuing with the decreases.
The same principle applies to the safety eyes. The pattern specifies approximately 7 visible stitches between them. Use that measurement as your placement checkpoint rather than relying only on visual guesswork.
Stuffing the Amigurumi
The stuffing schedule is different for each component, so it is worth keeping the instructions nearby while crocheting.
- Arms: stuff as you go from R1-R12.
- Legs: stuff as you go from R1-R15.
- Tail: stuff lightly.
- Head: start stuffing at R18.
Add Hollowfiber gradually so you can maintain the intended rounded shape. The purpose of stuffing is to support the crocheted fabric without changing the stitch structure or creating an uneven surface.
Important Stitch Checkpoints
Long amigurumi patterns become easier to manage when you stop periodically to verify the stitch count. Several useful checkpoints are built directly into this pattern.
- The ears reach 18 stitches in R3 before decreasing.
- The tail reaches 12 stitches in R2 and decreases to 8 in R4.
- The arms reach 15 stitches in R3 and 13 stitches in R7.
- The legs reach 30 stitches in R4 and decrease to 10 stitches in R17.
- The body reaches 48 stitches in R8.
- The head reaches 48 stitches in R11.
- The hat reaches 60 stitches in R13.
If your count is different at one of these points, it is better to locate the error before moving into the next shaping section.
Common Construction Challenges
Color Changes on the Head
The facial color changes are among the most detailed parts of the project. Keep both yarn colors organized and follow each stitch sequence carefully. The original creator also provides a video tutorial for these difficult rounds.
Attaching the Legs
The no-joint body version incorporates the legs during R9. Make sure both feet point forward and that they are symmetrical. The pattern explicitly allows you to adjust the stitch if necessary.
Joining the Arms
The arms are incorporated during R22. If the position needs a small adjustment, the source specifically says to adjust if necessary before continuing.
Adding the Ears
The ears are attached during R16 of the head. Compare both sides carefully before continuing with the decreases.
Fitting the Hat
The hat should be tried on during its construction. R7 creates the openings for the ears, and the pattern recommends adjusting the stitch if necessary after trying the hat on the head.
Final Assembly Checklist
- Two black ears are completed and not stuffed.
- The tail is lightly stuffed and has a sewing tail.
- Two black arms are completed and stuffed through R12.
- Two legs are completed and their feet face forward.
- The body is completed through R23.
- The head is completed through R22.
- The eyes are positioned between rows 8 and 9.
- The eyes have approximately 7 visible stitches between them.
- The nose is positioned between rows 3 and 4.
- The ears are attached during head R16.
- The head is sewn to the body.
- The tail is positioned between R7 and R9.
- The brown hat is completed through R16.
- The hat has been fitted around the ears.
What Makes the Finished Panda Special?
The appeal of this design comes from the combination of simple rounded shapes and carefully planned color placement. The white belly creates a soft central area, while the black shoulders, arms, ears, and legs establish the panda silhouette.
The face is the most distinctive part. The contrasting black sections around the eyes are built directly into the crochet, while the safety eyes and nose provide the final expression. The pink sections on the feet add another small detail without changing the classic panda color scheme.
The brown hat provides the final character element. Because it is crocheted separately, it can be fitted over the completed head and positioned around the ears.
About the Original Pattern Creator
The original pattern credits @Rosalie_Toys as the creator. The source asks readers to credit Rosalie_Toys as the pattern creator and not to copy or redistribute the pattern as their own. It also states that finished handmade items made from the pattern may be sold.
The original source includes a YouTube tutorial covering difficult moments of the project, including the head color changes, face shaping, and the jointed-leg option. The tutorial supplied in the pattern is available at https://youtu.be/7sWMN9BZDxg.
Giving the original designer proper credit is an important part of sharing a project based on this pattern.
Frequently Asked Questions
What hook size is used for this crochet panda?
The pattern uses a 4 mm crochet hook.
What yarn is recommended?
The main body color is Himalaya Dolphin Baby in white. The secondary colors are Himalaya Dolphin Baby in black and pink. Brown yarn is used for the hat.
What size are the safety eyes?
The pattern specifies 16 mm safety eyes.
What size safety nose is used?
The specified safety nose is 15/22 mm.
Are 30 mm joints required?
No. The joints are optional. The written PDF uses the version without joints, while the creator’s tutorial demonstrates the jointed version.
Where should the eyes be placed?
The pattern says to place the eyes between rows 8 and 9, with about 7 visible stitches between them.
Where should the nose go?
The nose is placed between rows 3 and 4.
When does stuffing begin for the head?
Stuffing begins at R18.
Which pieces are sewn on?
The original pattern states that only the head and tail are sewn on. The other parts are attached as you crochet.
When are the ears attached?
The ears are incorporated into R16 of the head.
Final Thoughts
This crochet panda is a rewarding plush amigurumi project that combines shaping, color changes, crocheted joins, stuffing, and final assembly in one design. The result is a soft panda with a rounded body, expressive face, forward-facing feet, and an adorable brown hat.
For the most accurate result, keep the original round numbers and stitch counts beside you while working. Pay special attention to the head color changes, leg positioning, arm attachment, ear placement, and eye and nose placement.
If you are new to plush amigurumi, work slowly and use a stitch marker throughout the project. Checking your stitch count at the end of each round can save considerable time later, especially in the body and head sections.
Once the final head seam is complete and the hat is fitted, your handmade panda is ready to become a soft decorative piece, a handmade gift, or a new addition to your amigurumi collection.